Greased Rear Shock Upper Pivot Bolt

Mileage: 29,404

Maintenance Summary:

  • Cleaned and greased rear shock upper pivot bolt with high-moly grease.

When I recently serviced the rear suspension the one thing I didn’t do was service the top pivot bolt on the rear shock;  I couldn’t figure out how to get to it.   According to the service manual you can service the bolt without removing the air box.  Frankly, I couldn’t see how.

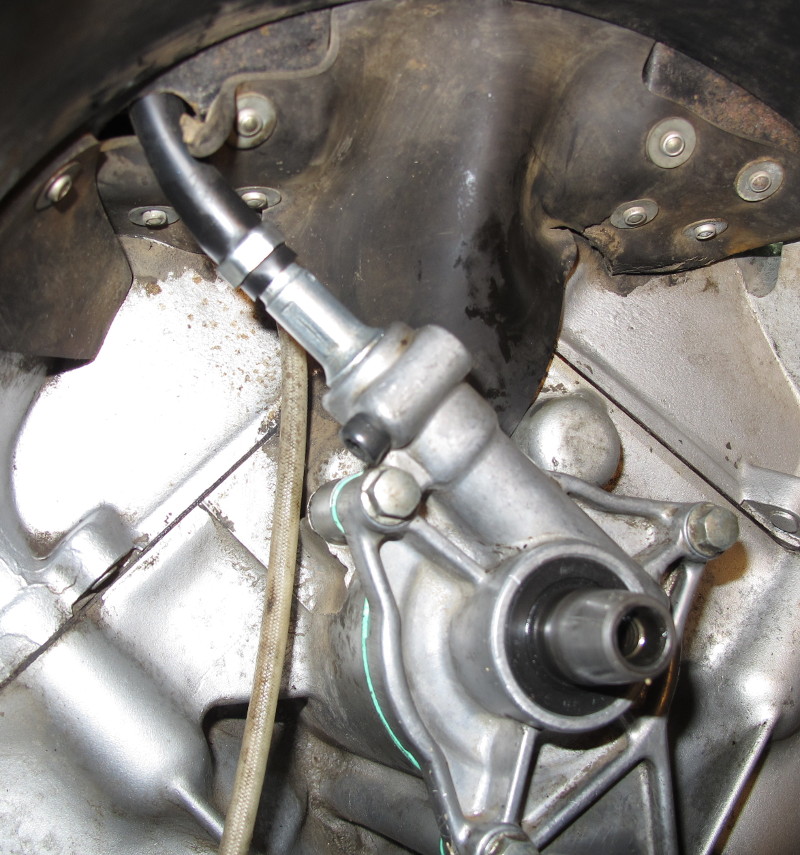
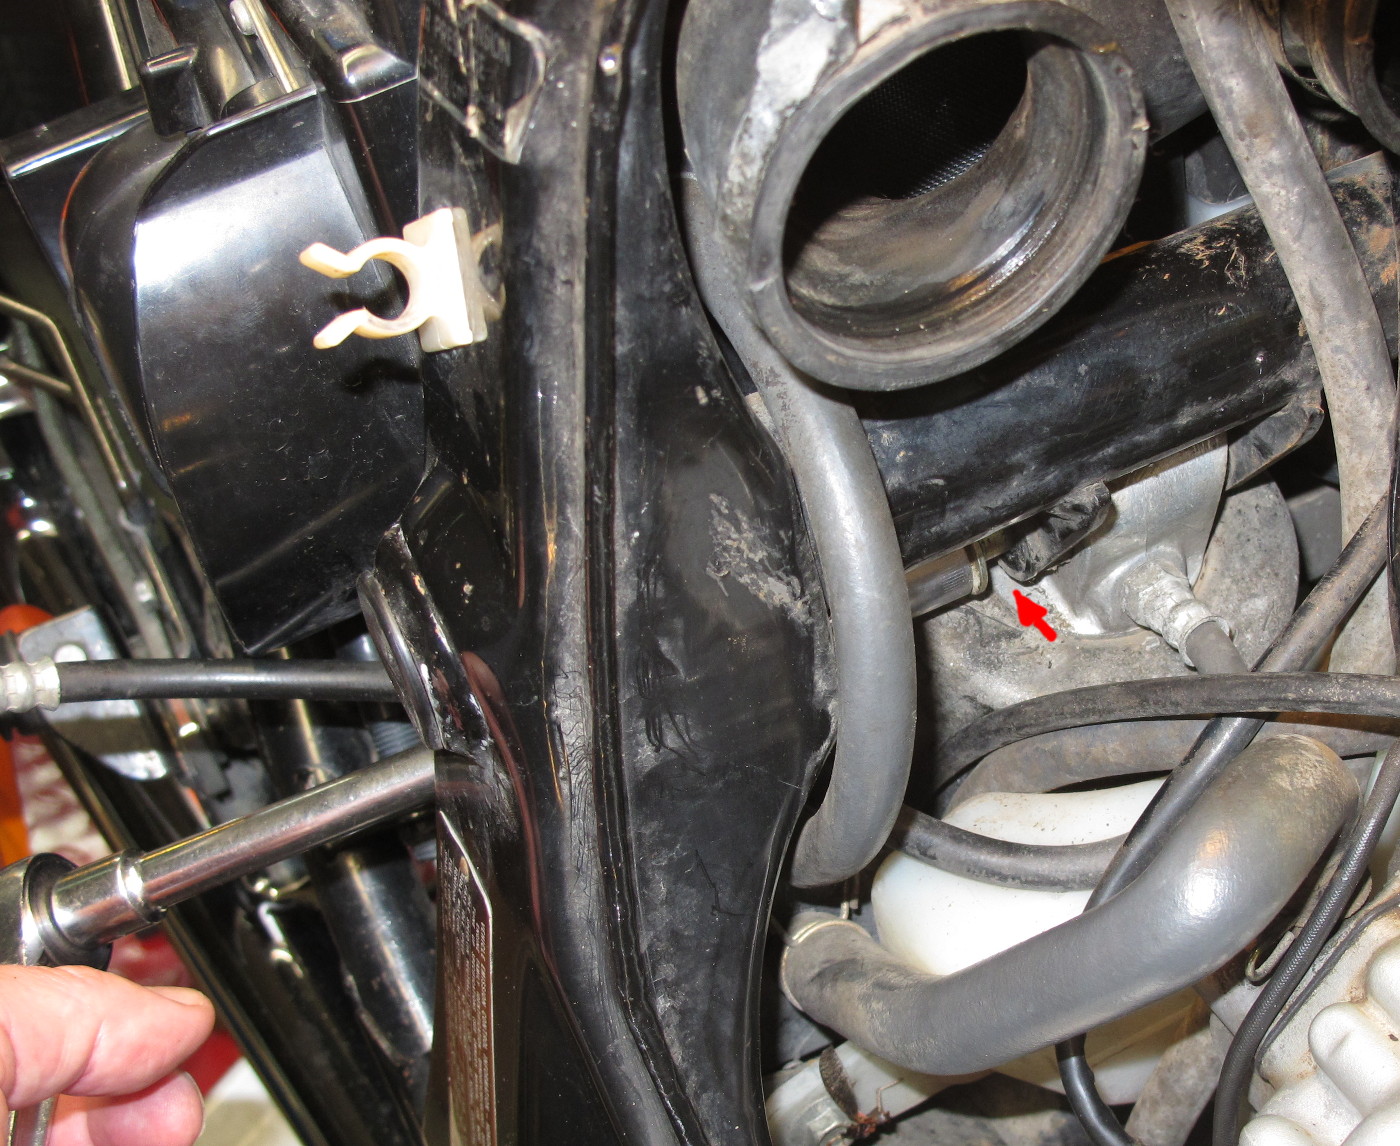
Look for the red arrow near the center of the picture below to find the bolt in question.  Here I’ve managed to get a socket on the bolt head using an socket extension and universal joint.  The extension passes through a narrow gap between the airbox and the frame.  Now, it might be possible to remove and re-install this bolt through this gap without removing the airbox (or carbs), but I don’t see how.

Note:  The nut on the left side of the shock is fixed in place making this job a bit easier.

The carbs are easy to remove on this bike, easier than the air box, so that’s what I did to gain easy access to this bolt.  The bolt was in very good shape with a little bit of old, very dry grease remaining.  I cleaned the bolt and coated it with high-moly grease before re-installing.

Note:  It’s a lot easier to remove and re-install this bolt with the rear wheel supported just enough to remove pressure from the bolt.  I used a block of wood and a large screwdriver under the tire.  When the bike is on the centerstand, the shock supports the rear wheel.

I have the seal required to rebuild the rear shock.  Those are no longer available from Honda, but I found a NOS part on eBay.  Since the shock is still holding air reasonably well I’ve decided not to attempt to rebuild the shock at this time.  Many people replace this shock with something else rather than rebuild them.

Fan, Tach Cable and Camshaft Seal

Mileage: 29,404

Maintenance Summary:

  • Replaced the following items:
    • Fan
    • Camshaft seal
    • Camshaft holder gasket
    • Camshaft holder o-ring
    • Tachometer cable and keeper screw.

While I had the front wheel off to rebuild the front forks, I decided to pull the radiator and fan so that I could replace the tachometer cable.  Well, as often is the case, once I had everything apart I found a few more items that required attention.

I pulled the fan using a 14mm bolt and the threads on the fan provided for this purpose.  It took a bit of work to get it to pop off the tapered shaft, but with a bit of pressure from the bolt and tapping on the end of the bolt with a hammer, it finally gave way.   The first thing I looked for was cracks in the fan — a common problem on this bike.   Sure enough, every rib has radial cracks extending from the aluminum hub.

Left unchecked a cracked fan has the potential to fail catastrophically and damage the radiator.  After briefly considering converting the bike to an electric fan, I decided to keep the bike original.  These fans are still available from Honda, and relatively affordable at $30.  Thank you Honda! I probably would have switched to an electric fan if the conversion didn’t require cutting off the end of the camshaft, or the fan was no longer available.

The cracked fan isn’t the only problem I discovered.  As you can see in the next photo, the camshaft seal and possibly the camshaft holder gasket have minor oil leaks.  As these two parts add up to less than $6, they’re getting replaced as well.

In the picture above I’ve already removed the Phillips-head screw that holds in the tach cable.  That screw was difficult to remove, especially with the fan shroud in place so, as others have suggested, I’m replacing it with an M5x20 cap-head screw.

With the camshaft holder removed, it’s easy to see one of the cams and lifters.  The screw gear drives the tachometer.

Here are the new parts.  The two o-rings are for the fork caps.
The new fan looks exactly like the old one — minus the cracks.

One of the things I discovered after removing the camshaft holder was that there was an o-ring seal that needed to be replaced.  This seal isn’t easy to find in the fiche.  I didn’t even know it was there before I pulled the camshaft holder. Fortunately the local Honda dealer had the part in stock.

I was able to remove the camshaft seal from the holder with my fingers.  It came out with very little effort.  The new seal went in just as easily.  The seal could have been easily replaced without pulling the camshaft holder — if that’s all that’s required.  Here’s the old seal and the new gasket.

Reinstalling the camshaft holder required turning the crankshaft until the pressure on the camshaft was such that the shaft was centered.  This was easily done by removing the cover near the oil filter and slowly turning the crankshaft bolt clockwise until the camshaft holder could be pushed in.  After sliding the holder most of the way in, I continued to spin the crankshaft to allow the tachometer gears to mesh as I fully seated the holder.

With the camshaft holder installed, I then installed the new tachometer cable and used a cap-head screw to hold the cable in place.  I then installed the fan and re-installed the radiator. I used blue Loctite on the holder bolts, tachometer cable keeper screw, and on the fan bolt.