I haven’t plated anything before but it turns out zinc plating is very easy, and relatively safe.
I pretty much followed the directions here with one exception. The author claims that zinc sulfate isn’t available in stores. While may be true in the author’s hometown, it’s not true here in the great North Wet where moss likes to grow on roofs. Here we can buy a product called Moss B Ware. This product is 99% zinc sulfate and I just happened to have some in my garage.
Living near salt water marinas is also an advantage in terms of sourcing zinc. I made a quick trip to the marina boatyard and rummaged through the zinc recycle bin. I found a couple of almost new outdrive zincs, and a couple of rudder zincs. The rudder zincs come in two parts so that they can clamp down on the rudder using a bolt passing through a hole in the rudder. Bottom line is I had six zincs to choose from. I could have had more, there were plenty in the bin.
So here’s the recipe, just mix together in a pail (WARNING: it’s boring – no fumes, bubbles or explosions):
- 300 grams of Epsom salts
- 100 grams of zinc sulfate (Moss B Ware)
- 200ml of white vinegar ( 7/8 of a cup)
- 1/3 bottle of Karo corn syrup
- 4.5 liters of tap water
Before using the zincs I wire brushed them to remove dried marine growth and rinsed them with fresh water. You’ll want to wear a good dust mask when you do this.
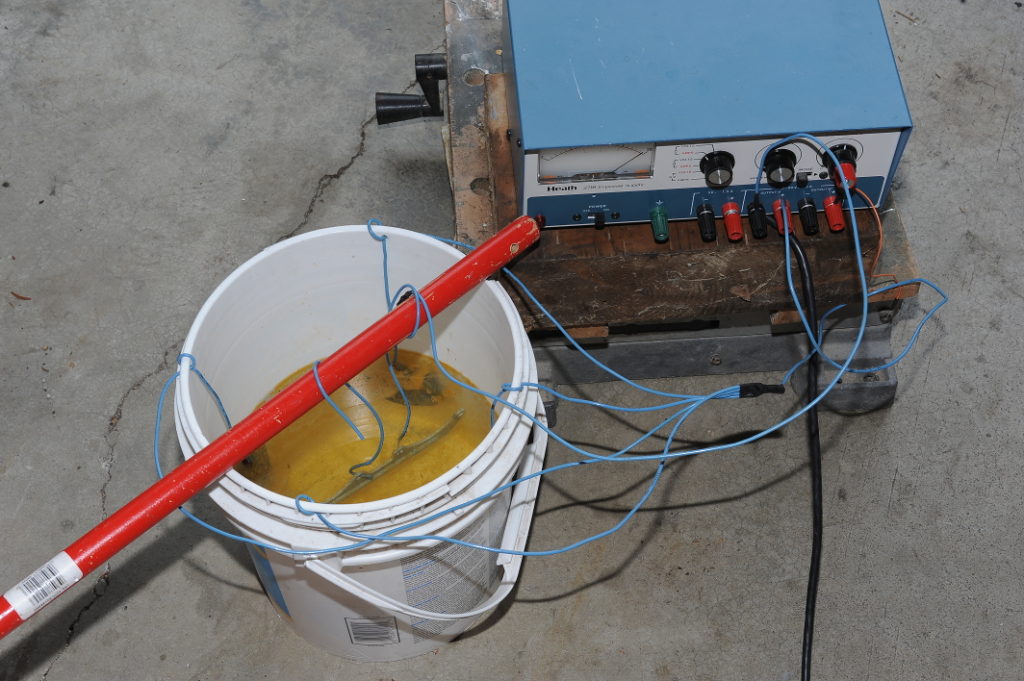
Having not done this before, and not wanting to invest too much effort until I saw some results I built the following contraption. It uses four zincs to surround the part for even coating. I adjusted the voltage on my bench-top power supply, a Heathkit that I put together more than 40 years ago, until I had the desired current. If you follow the link above, the author suggests 140mA per square inch.
I started by drilling four holes around the top of the pail. Having stripped a few inches of wire from four leads, for each lead I ran the bare wire through the hole in the zinc and wrapped it back on itself. That’s it. No screws. The four leads were looped through the holes in the bucket, tied together and ran through a single wire to the positive output of the power supply. The negative power supply wire is looped around the red handle, and the part suspended on a bend made on the stripped end. The second wire on the red handle is just there to support the part in a horizontal position, it’s not even stripped. I had to do this as the solution wasn’t deep enough to hang the part vertically.
So, does it work? Yes! It works very well. This metal strap was rust free less than a month ago; it was cleaned and polished while I had the carbs out to unplug jets. Even after cleaning it didn’t look that great, and, as the original zinc coating was perforated, I suspected the corrosion would return. It did.
Here’s the rear carburetor strap after plating and polishing. I expect, or at least hope it will look this nice for a long time.
This is the procedure I used on this part.
- I soaked the rusty part in vinegar for an hour or so and then used a Scotchbright pad to clean it up a bit more. After wiping it down with alcohol, I put it into the bucket to plate.
- The part would sit in the tank for about 15 minutes with the current set to about 400mA.
- After 15 minutes I would remove the part and remove the excess zinc with the Scotchbright pad. After another alcohol wipe down I’d return the part for another plating. Since I had four holes I could move the move the wires between the inner and outer pairs of holes so that everything got plated.
- I repeated the plating process four times.
- After a final Scotchbright scrub, I polished it up with a buffing wheel to achieve the result you see here.
The amount of current you use depends on the part’s surface area. Before subjecting any motorcycle parts to the process, I first tried plating a large washer. For that part I used 100mA for 10 minutes.
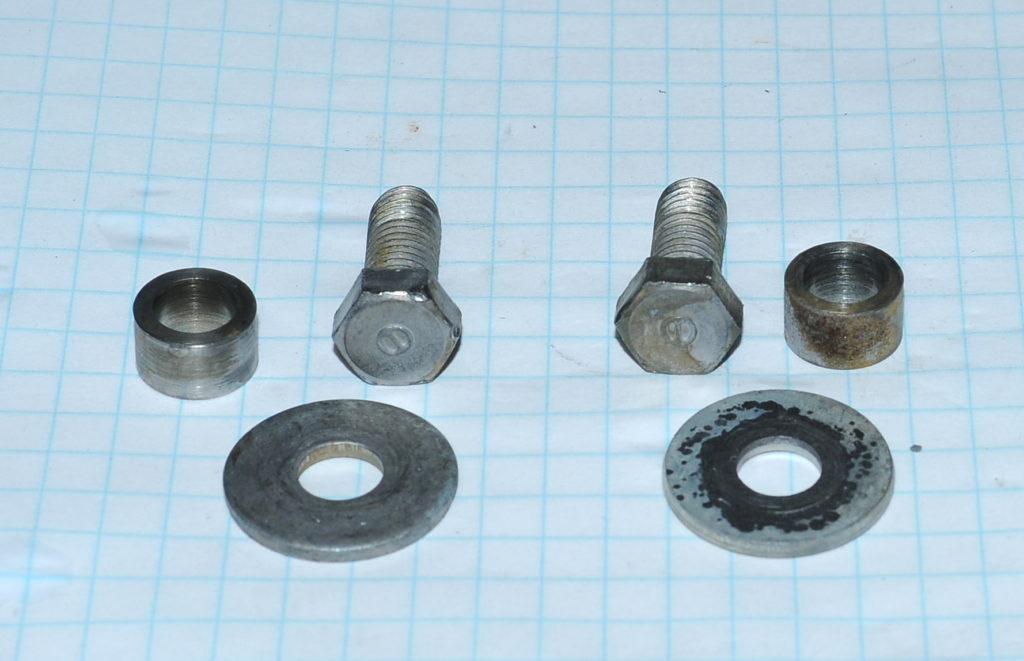
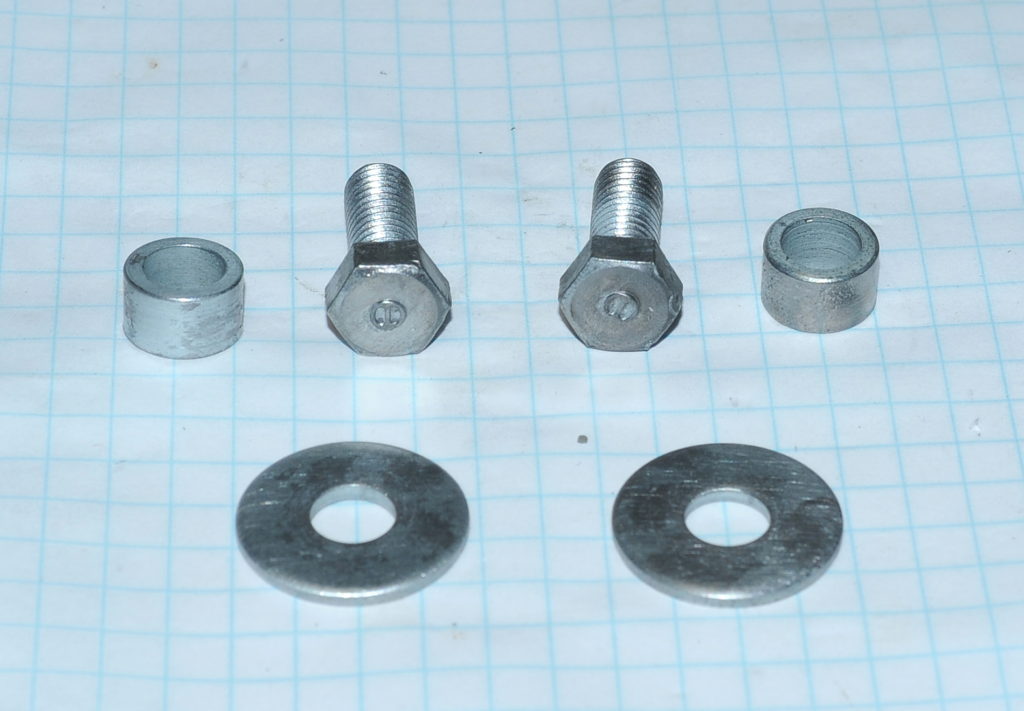
The seat hardware came out pretty good as well. The before picture is after an overnight bath in vinegar and 30 minutes in the tank with Purple Power degreaser. Before plating I gave them a scrub with a Scotchbright pad and cleaned them again with alcohol. Note the bolts are swapped left-to-right between the pictures. The spacer on the right is oriented the same in both pictures. I know this because of the pitting. The plating can’t fix that.


