
InMileage: 28,400
Today’s Maintenance:
- Rear Suspension Service
- Removed and Re-installed Pro-Link suspension
- Cleaned and then greased all pivot bolts, bushings and caps with hi-moly grease
- Note: Did not service pivot bolt at top of shock
- Removed and re-installed the mufflers
- Coated with red-copper anti-seize
The rear suspension began squeaking after the last long ride so I performed the service described here. Not only did the squeak go away after servicing the Pro-Link suspension, the bike feels way smoother to ride. If you have a GL500 and haven’t done this service, do it! It’s not that hard, or time consuming (depending on your exhaust).
Greasing the suspension is not listed as a regular service item, but it’s not surprising on a 36 year old bike to expect that some of the grease might not be as effective as it was when new. In this case, there wasn’t any grease left.
In the next picture, going from left to right, the two rear pivot bolts were dry, but otherwise in good shape. The shock bolt looked new even though it too was dry. The shock attaches to the upper tabs of the left link. As you can see, the pivot bolt that ties the two links together has some corrosion, as does the front pivot bolt (which was partially cleaned before taking this photo). The corrosions is not as bad as it looks. There was some minor pitting on both the bolts and the bushings, but not so much as to cause concern.
 I cleaned up the bolts and bushings using a mixture of ATF and acetone — sliding and spinning the bolts inside the bushings. I then followed up with some brake cleaner to degrease everything. The bolts I further cleaned up with a wire brushing and Scotchbrite pad.
The six caps were removed and cleaned as well. As I put things back together I used an acid brush to coat the bushings and caps with a high-moly content paste grease. I also coated the pivot bolts as I re-installed them.
Service hint: With the bike on the center stand, the shock is supporting the rear wheel. If you support the wheel, or lift it with a prybar or large screw driver, you can take the pressure off of the shock pivot bolt making it much easier to extract. You’ll need to do this anyway when you go to put everything back together.
The service manual seemed to imply that you only needed to remove the right muffler to service the rear suspension. Not true. The front pivot bolt can’t be removed with the “power box” in place. Also getting to one of the nuts on the left side for proper torquing required removing the left muffler as well. In the end I had to remove the exhaust rings so that I could slide the headers and power box forward and down a bit. In hindsight, it might have been possible to remove the entire exhaust system as one unit, eliminating the need to separate the mufflers from the power box.
The mufflers were a pain to remove. After struggling with the right side for some time I finally found a strategy the worked. Here’s the recipe;
- Use a large screw driver to carefully pry the tabs on the power box away from the muffler just enough to help break the bonds.
- In a well ventilated space, use your favorite penetrating oil, or create a 50/50 mix of ATF and acetone in a paper cup, mix well and then poor it over the the tabs. You don’t need to mix up very much. Wait for a while, at least 15 minutes. Longer is better.
- Place a wet shop rag over the muffler as close to the power box as possible. This will help keep the muffler cool.
- Use a heat gun, not an open flame, to heat the power box in front of the tabs.
- After a few minutes of heating the power box, slide the shop rag back and hit the muffler with cold spray (I used a can of Dust-Off turned upside down)
- Pry the back end of the muffler up and down as well as out and in while banging on the mounting bracket with a rubber mallet (where the passenger foot peg is located). This will drive the muffler out while the pushing and pulling will help break the bonds.
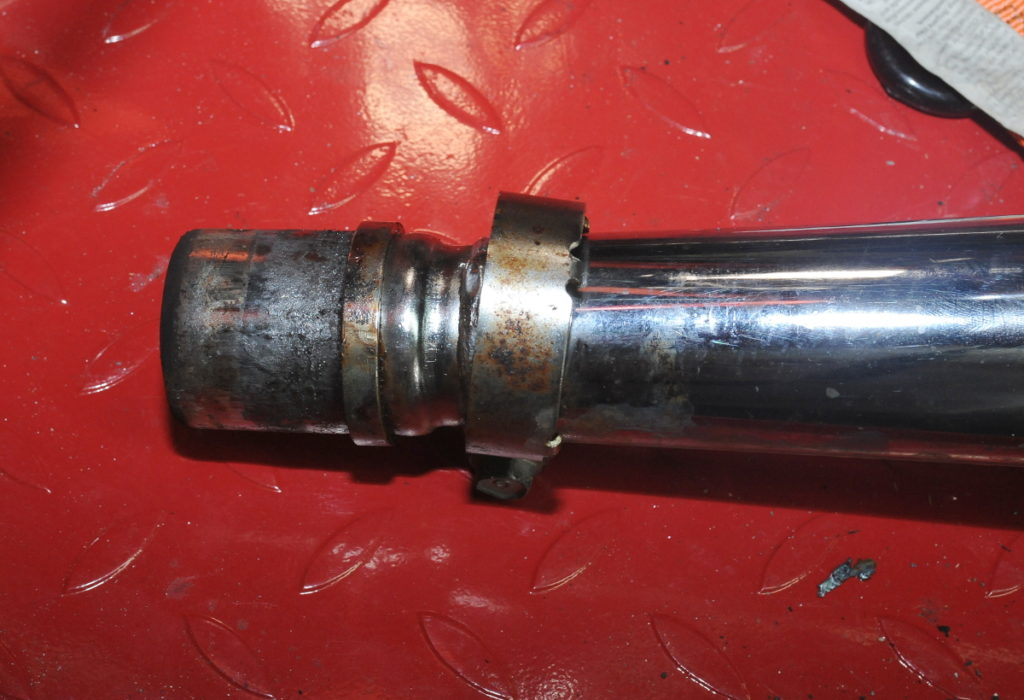
Here are a couple of pictures to show you what you’re up against. The muffler slides into a soft metal sealing ring which slides into the power box. This is the right muffler. The ring came out with the muffler on this side. These pictures show the mufflers just the way they came out. Nice and clean, but still hard to extract.
 On the left side, the sealing ring stayed in the power box.
 Here’s the sealing ring for the left muffler. I didn’t try to remove it from the power box.
 When I re-installed the mufflers I coated them with red-copper anti-seize. I also put a dab of the anti-seize on the screws that hold the chrome power box covers.
One of the hardest things to ever take apart on motorcycles has been, in my opinion, mufflers and exhaust. They weld themselves together with a thick layer of carbon. I’ve spent twenty minutes getting one crossover pipe off a Harley dresser.