Valve Cover Revisited

Mileage: 27,973

Today’s Maintenance:

  • Replace all remaining valve cover rubber.

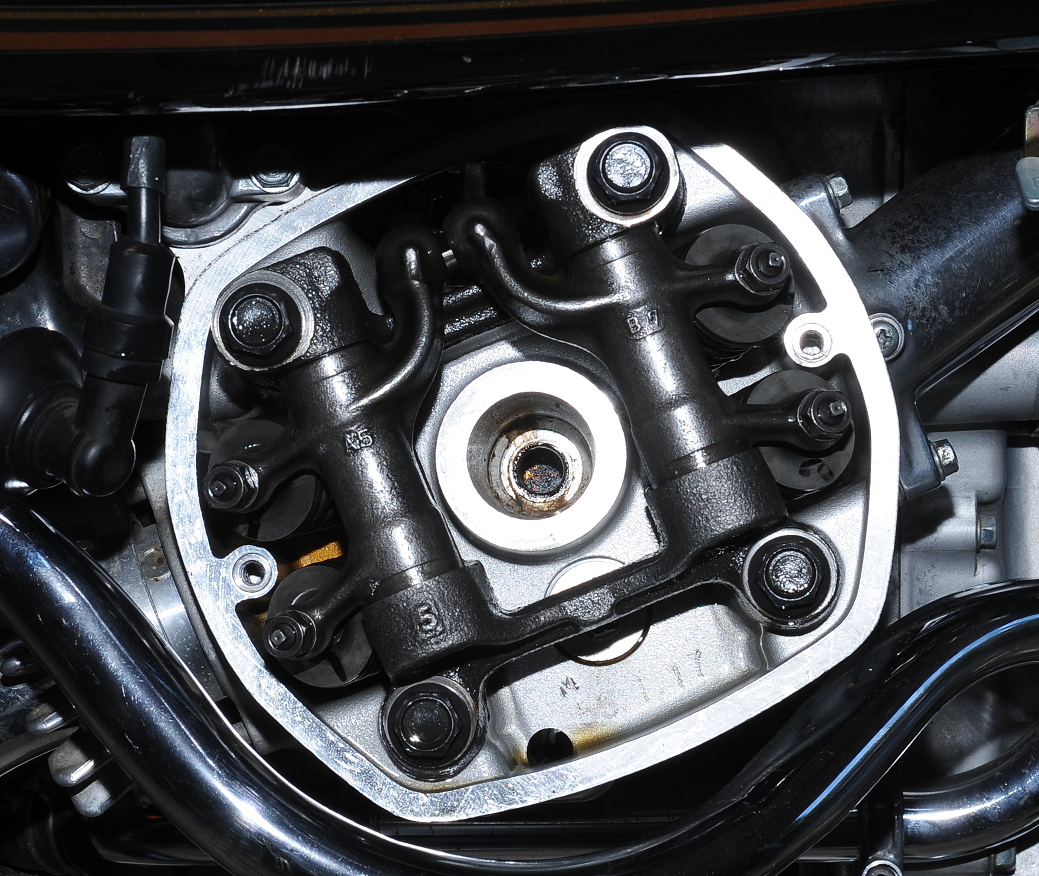
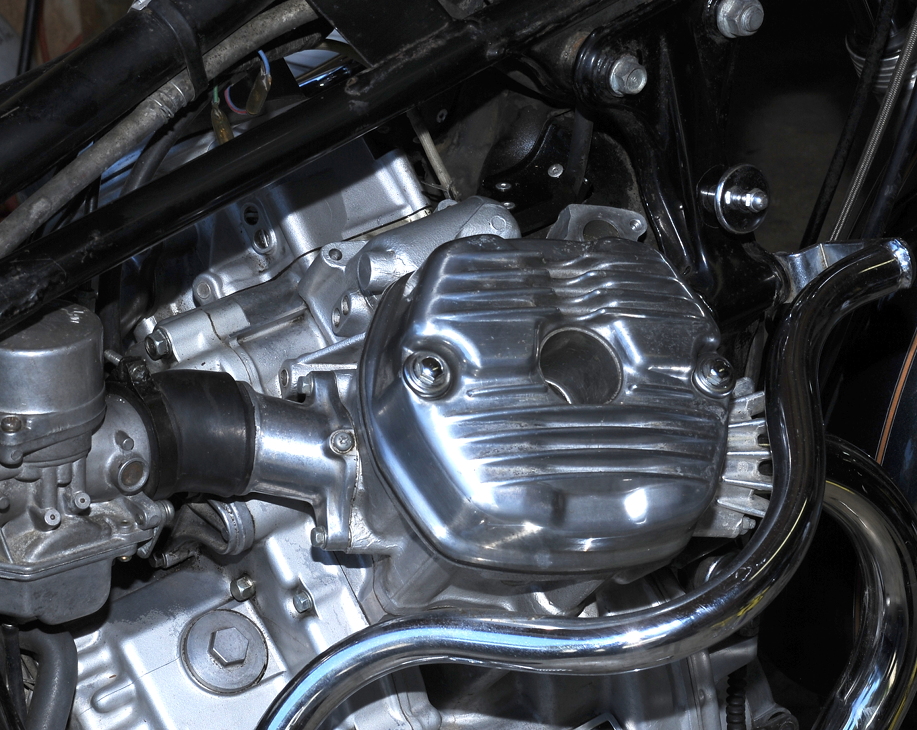
When I adjusted the valves a week or two ago I replaced the large outer valve cover gasket.  Unfortunately I had neglected to purchase the smaller gasket that goes around the spark plug well.  I reinstalled the old center gaskets and ended up with an oil leak that stopped after a couple of short rides.

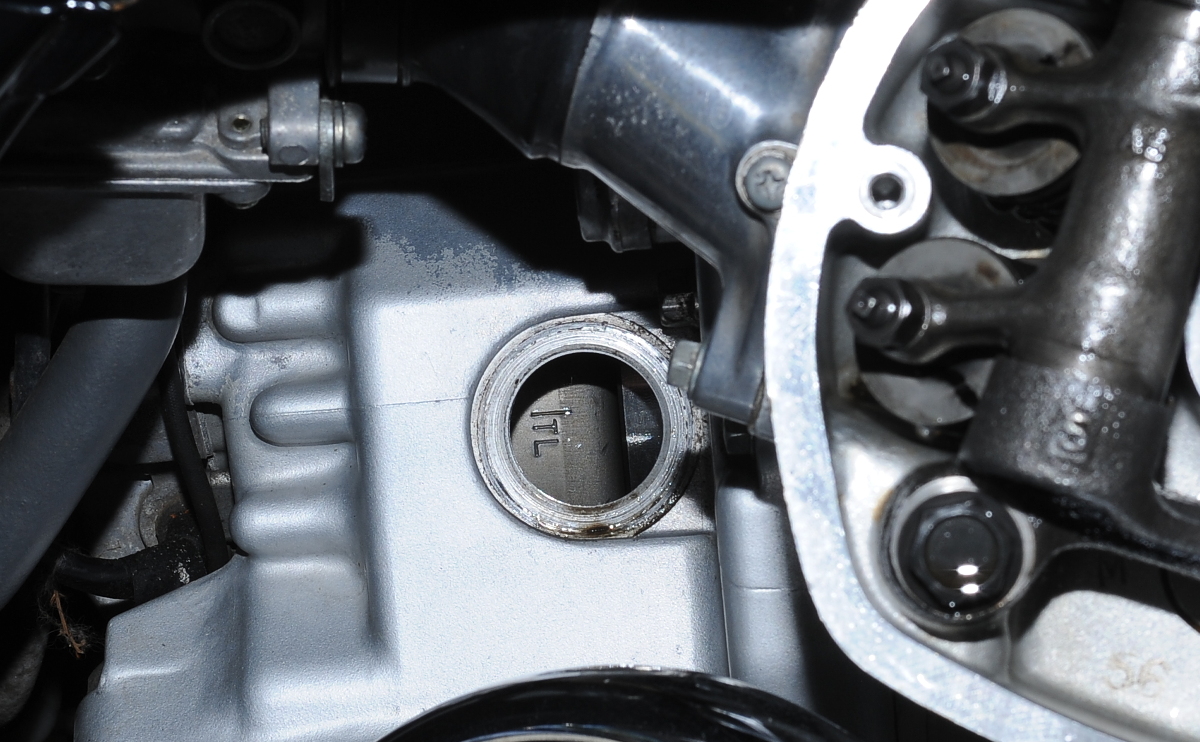
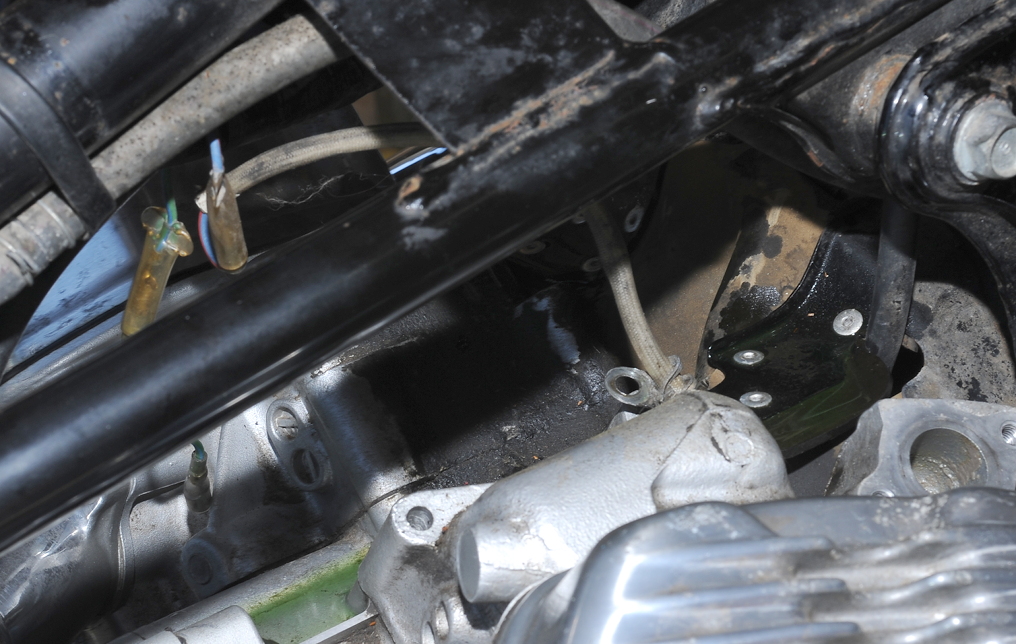
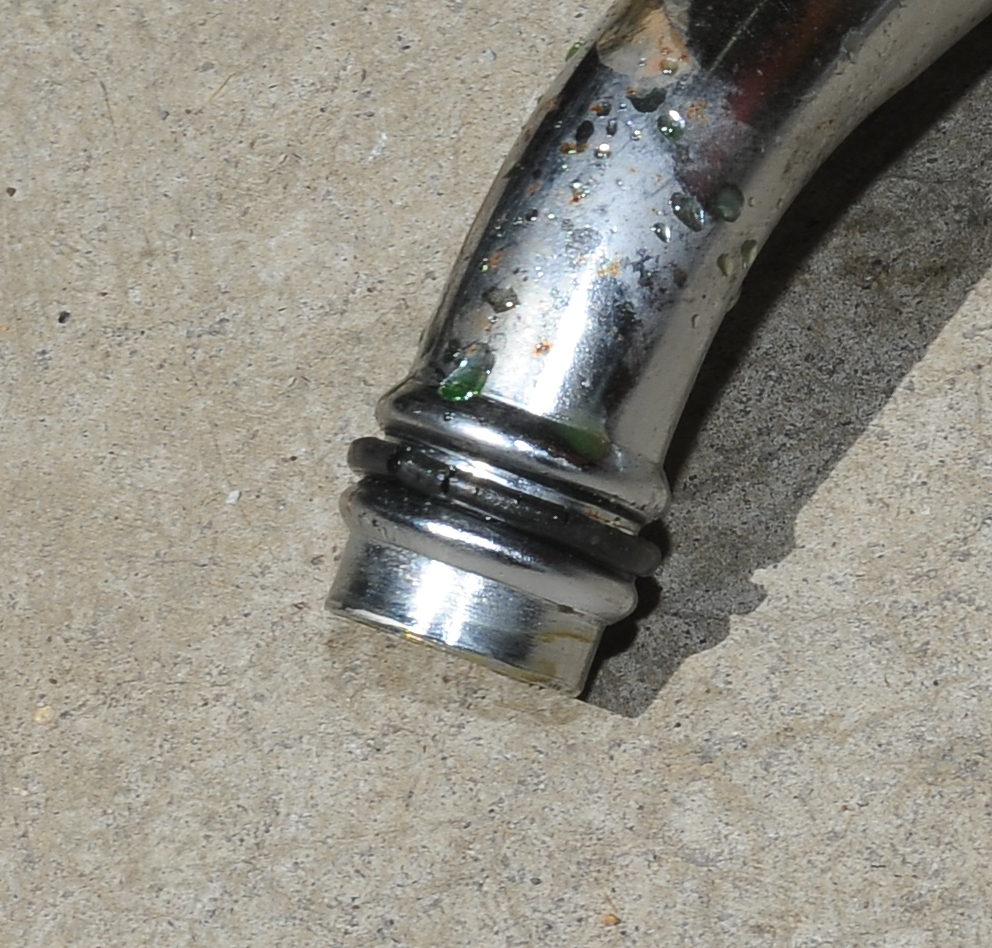
The leak was a little puzzling at first because there didn’t seem to be any oil on the new valve cover gasket.  That’s because the oil was leaking into the spark plug well when the engine was running and coming out a drain hole on the lower side of the cylinder case.

While pondering the leak I realized two things.  One, the new gasket would be thicker and so the old, center gasket might not have as much pressure applied. Two, that the “rubber, settings” as they’re called in the parts fiche, were probably a bit flat too.  These are the rubber seals that fit around the valve cover bolts and apply downward pressure to the cover.  So new rubber was ordered and installed.

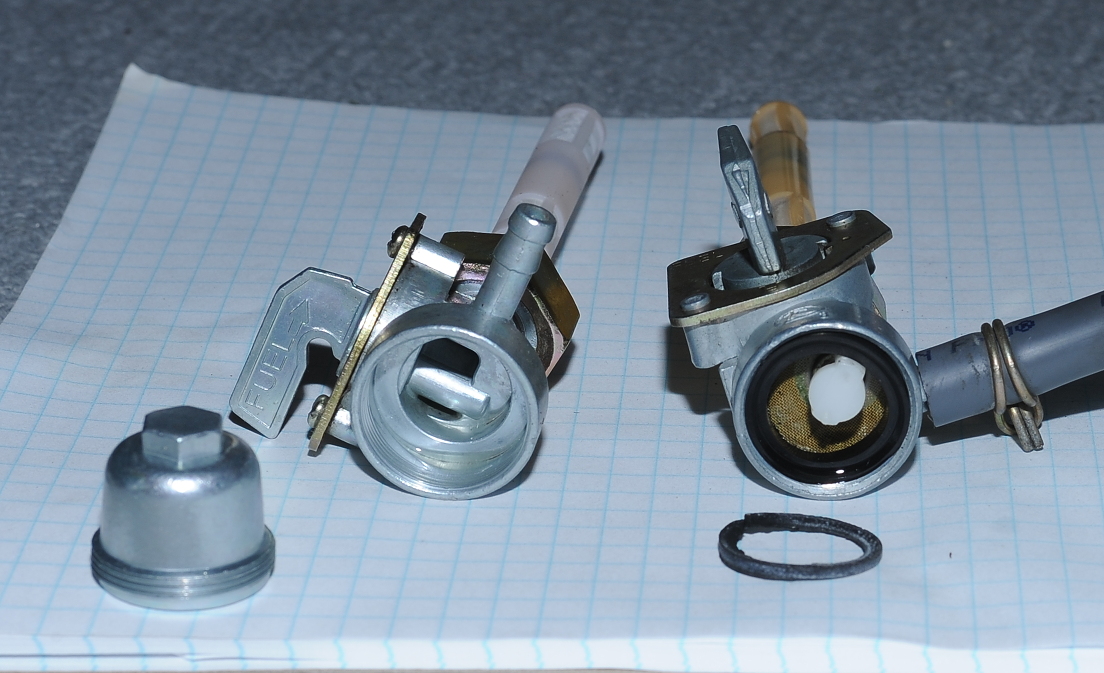
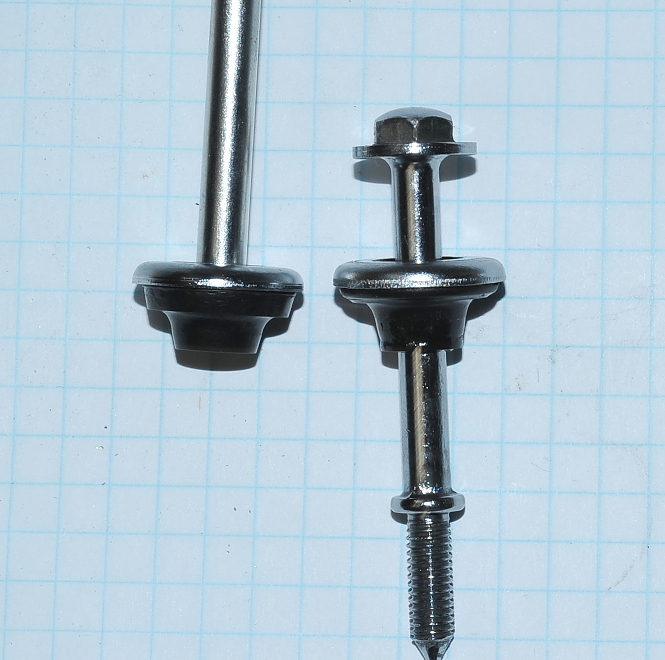
Below is a picture of a valve cover bolt with what I’ll call the hold-down seal.  You can see how compressed the old rubber on the right is relative to the new rubber the left.  I cut the old rubber off with a knife after separating the rubber part from the cap.  The new parts have beveled rubber on the cap side and push on over the bolt’s shoulder without too much effort.  With the new parts installed I could definitely tell there was a lot more pressure on the valve cover as I tightened the bolts down to the metal stops.  Shouldn’t leak now.

As an aside, these parts are shared with Goldwings, so while I installed Honda OEM parts, there are non-OEM versions of this part available as well.  In fact while four of these are used on the GL500, eight are used on Goldwings, so I found a lot of 8-packs available on eBay when I was searching for parts.

Cleaned Fuel Tank, Petcock, and Changed Front Brake Fluid

Mileage: 27,945

Today’s Maintenance:

  • Cleaned inside of tank
  • Cleaned fuel petcock, replaced bowel seal
  • Changed front brake fluid (DOT4)

The task I’ve been dreading is done.  The fuel tank is now clean.

There are many techniques for cleaning tanks: toilet bowel cleaner (hydrochloric acid), phosphoric acid, oxalic acid, vinegar and even coke or molasseses.  You can also use electrolysis, or throw the tank filled with sharp objects into a sleeping bag and then into the dryer.  I chose to use oxalic acid because, like phosphoric acid, it leaves a coating which helps prevent rust.   I would have used phosphoric acid, but I already had some oxalic acid available.  Oxalic acid also doesn’t affect the paint.

I started the task by shaking the tank with some kerosene and a length of swing-set chain inside.  The kerosene came out brown, so I did some good with that. I wasn’t expecting this to clean the tank, I just wanted to knock of any big stuff first.

After the kerosene I degreased the tank with Dawn detergent and water.

Next came the oxalic acid.  I used two cups of powder in 4.6 gallons of hot water.  The tank was pretty clean after six hours of soaking, but I decided to let it go overnight, so twenty hours total.  I then flushed the tank several times with water, then water with baking soda to neutralize any remaining acid, then more water.

The last step before filling with gasoline was to slosh around about one-half gallon of denatured alcohol to get any last moisture out of the tank.

The red stuff you see around the filler neck in the before picture is what’s left of an old tank coating.  I cleaned that off with acetone and a cotton swab.  There’s still a bit in the bottom of the tank which I didn’t try to remove.

I discovered why the red coating was in the tank.  You can see where the red coating has sealed some small perforations on the front, lower-left corner of the tank.  This picture was taken several hours after I cleaned the tank and filled it with gas.  It doesn’t appear to be leaking, but I’ll be keeping an eye on it.

Upon inspection the petcock bowel screen and gasket didn’t look that good, especially the gasket as you can see in the picture below.   You can’t buy the filter any more, so I ordered what looked to be a whole new petcock off eBay for $8 with shipping.  I could use it, it fits, but as you can see the new petcock on the left has shorter pickup tubes, so less reserve capacity.

The new part doesn’t have a bowel filter, so I decided to steal the gasket from the new petcock and reinstall the old petcock.   I’ll try and find a gasket so I can have the new one as a backup.  Unfortunately the pickup tubes are not interchangeable.

Last task for today was to change the front brake fluid.  I ran a lot of DOT4 fluid through the system to flush it.  The old fluid looked clean, but it was slightly darker in color than the new, so it was time.  The master cylinder was, and is, in very good condition.  Brake feels good.

Valve and Timing Chain Adjustments

Mileage: 27,945

Today’s Maintenance:

  • Torqued Head Bolts (nothing moved)
  • Adjusted Valves (only minor adjustments required)
  • Adjusted Timing Chain
  • Replace valve cover outer gaskets (should replace ones around spark plug well)
  • Installed reconditioned rubber mounts for instrument center panel
  • Aimed headlight

The valve adjustments were in pretty good shape.  A couple of the intake valves were a bit tight, but not by much.  I adjusted the intake valves to pass 0.003″ but not 0.004″ and adjusted the exhaust valves to pass 0.004 but not 0.005.  Here’s the left cylinder:

Left Cylinder
Right Cylinder

Here’s a mystery… there’s no timing pointer!  See the TL (top-left) mark on the flywheel?  Most drawings show the timing pointer at the center of the hole, so that’s where I positioned the timing marks when adjusting the valves and timing chain.

No surprise given the previous pictures, the covers are very clean inside.  The outer gaskets were replaced.  The old ones weren’t hard, but they’re feeling a bit stiff.  They can probably be reconditions, so I threw them in the used-parts bag.  I should probably replace the inner seals as well.  Perhaps I’ll do that when (if) I strip the clear coat off the covers and polish them.

Lots of minor maintenance items


Over the last few days I’ve accomplished the following:

  • Replaced brake cam felt seal
  • Greased splines with NLGI2 moly
  • Greased drive shaft joint with NLGI2 moly
  • Replaced rear-brake cotter pins
  • Adjusted rear brake
  • Cleaned and recharge K&N air filter
  • Adjusted clutch
  • Replaced clutch lever rubber boot
  • Inspected and lubricated clutch cable
  • Replaced missing instrument cluster hardware install new rubber
  • Replaced center stand rubber stopper on left muffler
  • Replaced missing swing arm dust cap on left side

The rubber isolators for the center instrument light panel are no longer available, so I’m attempting to recondition those.  They’ve shrunk over the years and the light panel is very loose.

The instruments were also loose, but not because of bad rubber, but because of missing hardware.  I was able to purchase and install the missing hardware.

There are some small rubber bushing on the back of the tach and speedometer.  One of those was missing.  They were pretty inexpensive to replace, so they’ve been replaced with new rubber.  The existing ones aren’t in too bad of shape, so they’re going into the used spares bag.

The instruments sit in large foam-rubber rings.  Those are in bad shape, and can’t be reconditioned.  I should have ordered them, but they’re more than $12 apiece.  Next order I’ll pick up a set.

The clutch didn’t feel stiff before, but after lubricating the cable, it’s a bit easier to operate.  I need to do the same for the throttle cables.  The throttle doesn’t always return to idle when the grip is released.

I had a hard time installing the new center stand bumper.  It went a bit easier after I realized the the mount was bent.  The pipe has a dent there as well, which you don’t notice when looking at the bike from above.  The bracket had the shape of an inverted-V, as did the old bumper; it almost looked like it was supposed to be that way.  I’m guessing at some point the bike hit a curb, or rock which pushed the center stand up hard into the stop.  I was able to straighten the mount and, with a bit of effort, soap, and a few choice words, install the new bumper. 


More Bike History from Previous Owner

After a very pleasant chat with the previous owner I now know a few more details about the bike’s history.

  • The PO had the bike for about 6 years, and put about 6000 miles on it, mostly in the first two years, and mostly freeway miles.  It sat after that, but was started last fall.
  • He believes the mileage is accurate.
  • He never had luggage for the bike.
  • He bought it from someone who had the bike in Arizona. (owners manual lists a California address, probably for the original purchaser).
  • The tires were on the bike when he bought it.
  • He invested about $1200 early on at a local shop having all of the usual maintenance performed.  The bike ran well when he was using it.
  • Additional maintenance performed in the last 6 years:
    • Carbs rebuilt (3 years ago,  that’s why there were cleaner than expected)
    • New thermostat  (I thought it looked new!)
    • Cooling system flushed
    • Replaced petcock with a used one from eBay.  He had a hard time finding the right one.  Original had an air leak that caused the bike to die a few times at freeway speeds.
    • Final drive oil replaced.

Rear Wheel Removal

Mileage: 27,945

Tonight I pulled the rear wheel to inspect the rear brake and drive.  Everything looks great!

Here’s the drive spline coming out of the final drive unit.  It was well greased.  Not knowing what grease was used or how old it was, I’ve cleaned off the grease so that I can inspect the splines as shown here.  I also want to start with fresh grease when I put every thing back together.  I don’t see any signs of wear.  Do you?

The driving dog on the wheel side is also in very good shape, here are a couple of pictures taken after I removed the old grease.

It’s hard to tell if there’s much wear, some of the splines do look like the edges are asymmetrical.

The rear bearing are in good shape, they turn smoothly and don’t have any play.  The ubiquitous 6302RS bearing shown in the photo above is also used in the front wheel.

Further adding to the body of evidence supporting the low mileage on the bike, the rear drum shows very little wear.   That, or previous riders didn’t use the rear brake.

I’m going to replace the felt dust seal around the brake cam shaft.  In this picture you can also see the missing tooth in the cam which is used to index the brake wear indicator.  Also visible is the punch mark on the end of the shaft.  When assembled, this aligns with the punch mark on the lever, which is just visible at the 6 o’clock position.

When I adjusted the brakes to fix the brake light problem, I suspected I’d find new brake shoes when I removed the rear wheel.  I was correct in my suspicions. The brake shoes look new.

I removed the shoes and, after cleaning the brake cover and other components, greased the cam, cam shaft and pivot pins with red lithium grease.  The cotter pins shown partially installed here will be replaced with new pins before I reinstall the rear wheel.

Final Drive Oil, Helmet locks and passenger pegs

Current mileage: 27,933

Today’s Maintenance:

  • Changed Final Drive Oil
  • Tightened both helmet locks, they were very loose
  • Replaced passenger foot peg bolts with longer bolts
  • Drained Crankcase breather (nothing came out)

After a short ride to warm up the oil.  I drained the final drive unit and refilled with StayLube 85W/90 Hypoid oil.

Both helmet locks were loose, so I removed all of the hardware necessary to allow me to pull the chrome tubes they’re attached to, allowing access to the screws.

Case/Seat Latches and helmet lock (just visible behind tailight)

The procedure is as follows:

  1. Remove the rear seat or case
  2. Remove the shaft clips on the end of the locking bar shafts. Make note of how the seat locks are assembled, or refer to the picture, and then remove the shafts by pulling the locking bars out.
  3. Remove the bolts a the forward end of the chrome tubes, just behind side covers.
  4. Remove nut at the rear end of the chrome tubes.  The nut is on the hollow bolt through which the locking-bar shaft passed.
  5. Disconnect the tail light wires under the seat and slide the assembly off the hollow bolt.
  6. The locks are held on by a headless bolt coming in from the front, and a Phillips-head screw on the back.  Remove the screw and twist the lock and headless bolt until they are as tight as possible and the screw hole is visible through the slot.
  7. Reinstall the screw.  I added a washer to allow the screw to be tightened.  It was bottoming out without the washer.

While I had the top end of the crash bars disconnected, I removed the passenger foot pegs so that I could remove the crash bars for cleaning (they had some rust on them).  It was very hard to reassemble because the crashbar and luggage mount used up a lot of bolt thread.  I bought some slightly longer hardened bolts and installed those instead of the originals.

The badly degraded center-stand rubber bumper, which mounts on the underside of the left muffler, fell off while I was working on the bike. I reinstalled the bumber with a tie-wrap until I can obtain part to replace this one.

Cooling System

Current mileage: 27,927

Today’s maintenance:

  • Drain and flush the cooling system
  • Remove the cooling tubes and elbows, replace all o-rings
  • Pull thermostat housing, replace o-ring
  • Replace coolant sensor with NAPA EDH TS6045
  • Test thermostat
  • Cleaned out crud from under thermostat housing (more on left cylinder, than on right, need to check cylinder valve cover seal).
  • Filled cooling system with Prestone DexCool Extended Life coolant
  • Changed oil:  Honda Filter 154A1-413-505,  Rotella T4 15W-40
  • Cleaned up crud under thermostat as well as various cooling system parts (e.g. tubes, housing, hose clamps).

The internals of cooling system are very clean.  The thermostat looked brand new.  I tested it for proper operation before reinstalling it.  I purchased a NAPA part to replace the thermostat, and while it would have fit, the NAPA thermostat (THM 535080) had a smaller diameter valve and didn’t look like it would pass as much coolant, so I returned it.

The radiator has a minor amount of scale buildup visible through the radiator cap, but it doesn’t yet need to be boiled clean.  Will check again at the next coolant change.

Based on internet research, I bought a NAPA radiator hose (NBH 11644).  Other owners reported that they could cut this up into the pieces needed to replace the Honda radiator hoses — which are no longer available.  The hose diameter looked way too small, so I also returned this part.   Perhaps they increased the hose diameters with the GL500?  The good news is that the hoses I pulled off were in very good condition, pliable and no cracks, so they should be good for several more years.

With the coils and thermostat housing removed the crud on the left cylinder was visible.  It looks like there was a valve cover leak.  Need to check that.  Note how clean the cooling system inlet is on the far right, where the cooling tube elbow attaches.

As you can seen from the green coolant in the photo above, the bike had regular Prestone antifreeze in it.  I flushed this all out with distilled water and replaced with Prestone DexCool Extended Life.  This is less abrasive (non-silicate, better for water pump seals) and is aluminum safe.

TIP:  The screws to drain the extra 0.4l of coolant from each cylinder are impossible to get to so I didn’t drain those.  Instead, after flushing with distilled water and draining the radiator I just assumed that I had still 0.4l of water in the system, so I added 0.4l of undiluted coolant before filling with a 50/50 mix of coolant and distilled water.

This is before I reinstalled the thermostat and coils — all nice and clean.  Now it will be easier to spot leaks.

The radiator is in good shape.  You can see inside the thermostat housing.  Very clean.  That large o-ring in the thermostat housing was replaced. Both radiator hoses are in good shape, as are the four hose clamps, so they were cleaned up and reinstalled. 

The cooling system o-rings definitely needed to be replaced.  This is the lower-radiator tube end that goes into the back of the engine.  I replaced this, plus the four o-rings on the short tubes that go from the thermostat housing to the cylinders, and the two o-rings that go between the cylinder and the tube elbows.  I was able to purchase all of the parts at the local Honda dealer.

I didn’t pull the radiator fan to check for cracks, I’ll do that next time.  From the front the fan and shroud looked to be in good condition.  I did loosen and re-torque the fan bolt.

Front wheel troubleshooting

The bike had a somewhat strange problem when being moved around by hand.  Pushing it straight was easy, pushing with the wheel turned was hard.

The seller told me about this when I first went to look at the bike.  He thought it was a wheel bearing problem, yet there didn’t seem to be any looseness in the wheel.

Today I pulled the front wheel to inspect the bearings.  The cause of the problem was immediately obvious as soon as I started to take the wheel off.  The axle clamp nuts (on the end of the forks) were only hand tight. This allowed the wheel to twist enough that the brake caliper would drag.

NOTE TO SELF: Check for loose parts before hopping on an unknown bike that hasn’t been ridden in a long time.

While I had the wheel off, I did grease the bearing on the speedometer side, as well as the speedometer gear.  The bearings feel great.  When I get the right tool for the job, I’ll clean and grease the bearings on both sides.

Just to be safe, I also re-torqued the rear wheel axle, axle clamp and brake nuts.